- Tuesday 23 May 2017
- 0 Comments
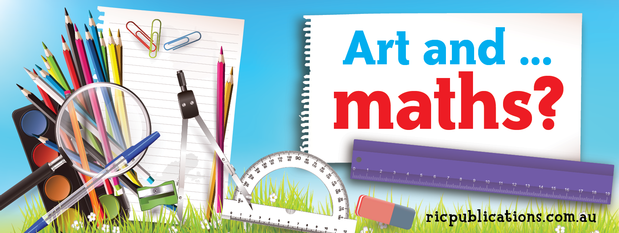
Who loves art but doesn’t love maths? Children of course, being the intuitive creatures they are, can pick up on these vibes, so here are some great activities that combine the fun of art with the necessity of learning maths. We find them great, and are sure you will too!
Tessellations are a great way of learning about shapes, and location and transformation.
Students can find out which shapes tessellate best and the properties of these shapes. Students can then observe real life tessellations in hand-made quilts and look at the art of MC Escher. Find some tessellation projects here.
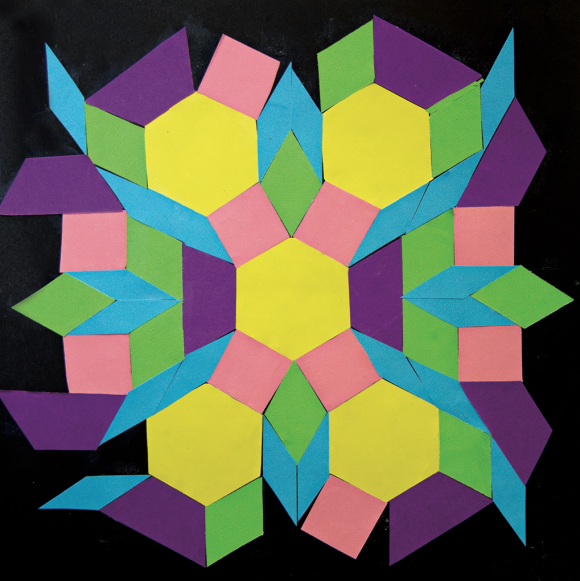 PROVIDE: pattern block shapes, coloured paper (one colour for each different shape), scissors, pencils, black cardboard squares or rectangles for background, glue
MAKING: Students cut out and glue the shapes onto the black background leaving no gaps between the shapes. Continue until a desired design, pattern or shape is complete.
RESPONDING: When discussing the artworks, make reference to ‘slides’ or ‘turns’ (locomotion and transformation) required to move the shapes into place. Students may be asked to write a sentence or two about their design, shape or pattern.
Make a fraction hot air balloon.
Give the students a cardboard rectangle divided into four, six, eight, ten or twelve (depending on which fractions you’re dealing with) and have the children use three or four colours to complete the rectangle (basket). On the balloon shape, students write sentences to describe the coloured fractions. For example, 3/8 (squares) are pink, 2/8 are blue etc.
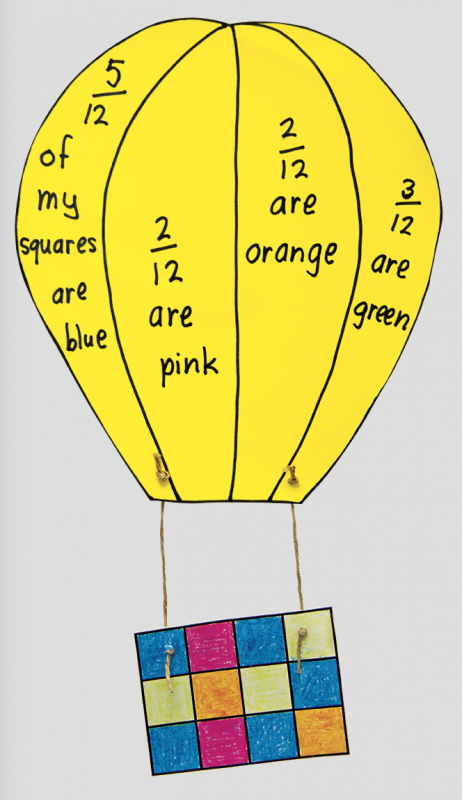 (Use 4 squares for the basket when doing quarters, eight when doing eighths and so on.) The example shown is for twelfths.
PROVIDE: squares of white cardboard divided into twelfths; coloured oil pastels or crayons (limit the number of colours—no more than four); pencils or markers; white hot air balloon shape; wool, string or twine
MAKING: Students select crayons to colour any number of squares in the grid. Repeat until all squares are coloured.
Students count how many of each colour are completed out of twelve. This gives a fraction. For example, 5 of 12 are blue (5/12), 3 of 12 are green (3/12) and so on.
RESPONDING: Students write a sentence on the hot air balloon shape about the fractions coloured. For example, ‘I coloured 5/12 of my basket blue’.
Attach the hot air balloon to the basket using string, wool or twine.
Students comment on their own and others’ hot air balloons. If students have coloured their basket in a pattern, make reference to these.
Ask students to make a right angle finder like this monster.
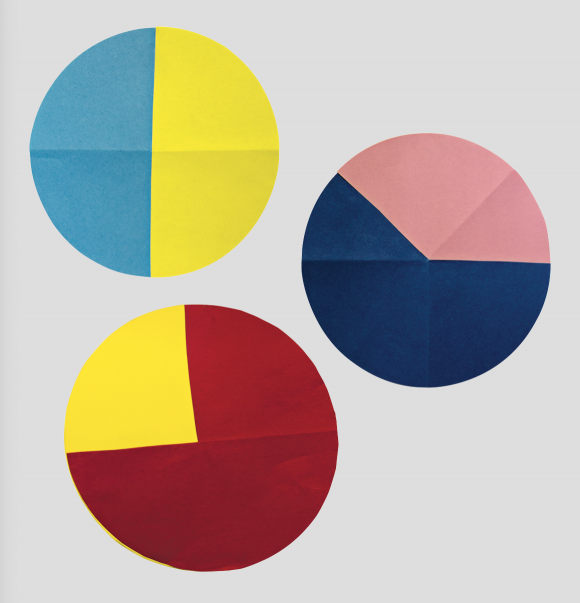 There is also a more elaborate (and sturdier) version here, which has been used in a game. Coloured squares, rectangles and circles can also be folded into quarters to make a simple example.
There’s a great example of using coloured circles to create an angle finder here.
PROVIDE: two circles the same size, each a different colour per student; scissors
MAKING: Students fold each circle into quarters then cut a slit from the outer edge to the centre along the ONE folded line on each circle. Slip the circles inside each other to the centre using the cut lines.
RESPONDING: Turn one circle to create an angle with the other circle. Vary the turns to create right, straight, acute and obtuse angles. Discuss the effectiveness of the angle maker and/or ways to create a better one.
For young students, make addition chains like those here.
They are great as classroom decorations, and students can experiment with different numbers and colours.
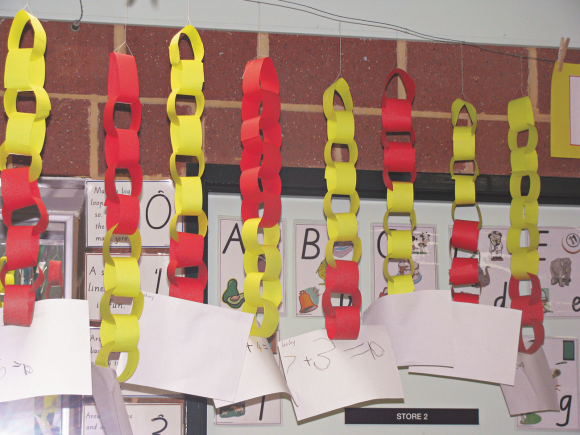
PROVIDE: strips of coloured paper approximately 3 cm wide and 20 cm long (no more than 10 of each colour strip), glue or tape, markers, white cardboard strip for label
MAKING: Each student must use both sets of coloured strips to make 10, 20 or a total chosen by the teacher.
Student selects one colour strip to begin a chain by gluing the ends together, then slipping another strip through it. Students stop when they have the number of desired strips. (It’s easier to count the number of each colour if links of the same colour are together.)
Students then swap colours to add the final chains until they reach the count needed.
RESPONDING: To complete the activity, students count how many of each colour link there are. They use the marker to write an addition sum for 10, 20 or the number chosen by the teacher. Make comparisons between chains. For example, ‘Jane’s uses more yellow’; ‘Justin’s is longer than Mary’s’ etc.
Need more ideas linking mathematics to visual arts? Check out our Awesome art and craft series with Australian Curriculum links.
Download this article as a PDF here.