- Thursday 06 December 2018
- 0 Comments
Pop stick Christmas ornaments
 You will need: pop sticks or tongue depressors, coloured/white paper, black fine-tipped pen, odds ‘n’ ends (e.g. scrap fabrics, ribbons, buttons, sequins, raffia, glitter, tinsel, glitter pipe-cleaners) for decorating, corrugated cardboard (for angel’s wings), strong glue and scissors
- Students can cut out shapes to suit the Christmas character they wish to make from the coloured or white paper; for example, a white dress for the angel, a red suit for Santa, a hat for a snowman or corrugated wings for the angel. (Templates can be used for younger students to trace around.) Glue the basic parts on to make each character. Students can then use the ‘odds ‘n’ ends’ to decorate and complete their ornament, letting their imaginations guide them; for example, bows, scarves, buttons, hats, fur trim, belts etc. Attach the angel’s wings from the back with glue. Use the fine-tipped pen to add facial or special features where needed.
- Attach a looped piece of tinsel or glitter pipe-cleaner to the back of the head as a hook to hang the ornament.
- Stick characters can also be used as pop stick puppets. Using a simple stage, like a shoebox with the back removed, students can perform Christmas plays for their peers.
Small hands Christmas wreath
 You will need: green construction paper, pencil, scissors, glue, odds ‘n’ ends (e.g. ribbons, sequins, glitter, coloured paper)
- Students will need about 8–10 tracings of their open hand on green construction paper. Cut out the hand shapes. Arrange the hands in a circle with the wrists overlapping and the fingers pointing out. Glue into position to form a wreath shape. Students can then decorate their wreath using pieces of the ‘odds ‘n’ ends’ materials. For example, they could add ribbons, bows, small Christmas shapes (e.g. stars, presents, bows to trace from templates), glitter or sequins to complete their wreath.
- Display around the classroom or send home as a keepsake for parents or grandparents. Date the back of the wreath with the child’s name, age and year.
NOTE: Younger students may need assistance with varying parts of this activity.

Rudolph the red-nosed reindeer
You will need: coloured construction squares, white paper, black felt-tipped pen red paper or red pompoms, scissors and pencil
- Students need to trace two hands onto a selected coloured sheet and one foot (with their shoe on) onto a different coloured sheet. Carefully cut out the shapes. Place and glue the hand shapes (fingers pointing out) either side of the shoe shape (heel end) to make the reindeer antlers. Draw (or trace around a template) two eyes on the white paper. Cut out and glue onto the foot shape. Glue on a red nose (either cut from red paper or a red pompom) to complete the Rudolph. When dry, use the black felt-tipped pen to finish the eyes of the reindeer.
- Create a ‘herd’ of reindeer as a display around the classroom. This activity is also a nice keepsake for parents of the child’s hands and feet at that age (add the child’s name, age and the date on the back).
Snow dome
 You will need: One glass jar per child, plastic modelling clay, glycerine (100 mL per 10 jars), glitter, food colouring, bucket, jug (Glycerine helps to suspend the glitter.)
- Label jar and lid for each child.
- Children attach a pillar of plastic modelling clay to inside lid (to lift their model above the jar neck). They create Santa (decorated tree or reindeer etc.) on a pillar, checking occasionally that the jar still fits over it. Ensure the various components are firmly joined. Add some glitter to the jar.
- Add 100 mL of glycerine and food colouring to a bucket of water. With a jug, pour this mixture into a jar and, holding it over the bucket, submerge model. Be sure there is as little trapped air as possible and then screw the lid on tightly.
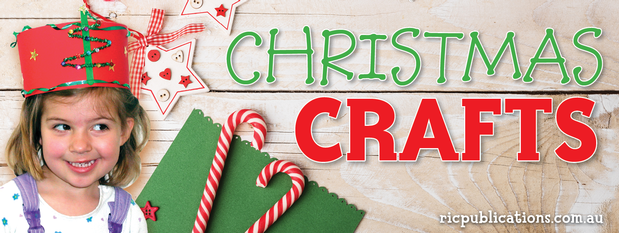
Christmas tree hat
 You will need: red cardboard, 1 green pop stick, 1 green sparkly pipe-cleaner, 1 gold sequin star, a variety of small coloured sequins, curling ribbon, gold stars for decoration, strong glue, scissors and a stapler
- Cut the red cardboard to fit your head (approximately 64 cm long and 10 cm wide). Decorate the top and bottom edges of the headband with curling ribbon and staple or glue in place. Glue the gold stars along the hat, leaving a space for the tree in the centre. Allow dry.
- Bend the green sparkly pipe-cleaner into shape and glue in place on the pop stick. Glue the gold star to the top and the coloured sequins along the tree. When dry, secure to the band using glue or staples and staple the ends of the band together to fit the head.
- Allow the students the freedom to experiment with different materials collected from home. They may like to create a reindeer, Santa, bell, stocking or candle to decorate the centre of their hat.
- The children may need assistance to glue on the sequins as they are awkward to handle.
Christmas bells
 You will need: egg carton, small jingle bells, gold or silver foil, skewer or darning needle, scissors, glue or tape, tinsel, ribbon or tinsel pipe-cleaners
Carefully cut out the raised sections of the egg cartons and trim the edges. Cover each piece with foil, making the surface as smooth as possible and tucking the ends inside the shape. (If needed, glue or tape down any loose edges inside - allow to dry.) Gently poke a hole through the top of each bell shape, using a skewer or needle. Thread ribbon, tinsel or pipe-cleaners through the hole. Attach a jingle bell to one end of the ribbon and gently pull it through the hole until the bell is hanging inside the shape. Make a bow or decorative shape to hang the bells from using the tinsel, ribbons or pipe-cleaners. Cut off any loose ends. Decorate the bells with sequins if desired, and hang as ornaments on the Christmas tree or around the classroom.
Christmas stocking
 You will need: scissors, clear contact, a clear plastic book covering, various colours of scrap cellophane paper, a small quantity of green cardboard, a small quantity of red crepe paper, curling ribbon, a needle with a large eye
- Using a permanent marker, trace around the stocking template twice for each child - once on clear contact and once on the plastic.
- Remove the backing from the contact and place it, sticky side up, flat on the table. Using the cellophane scraps, cut out small shapes and place them all over the stocking shape until the whole area is covered. No sticky patches must remain or the stocking will be difficult to fill!
- Place the second stocking shape (the one cut from plastic) directly on top of the first, staple together and allow the child to cut them out as one. Punch holes around the edge. Leaving the top open, allow the child to sew around the edge with curling ribbon.
- Add holly and berries cut from green cardboard and red crepe. Glue (or staple) onto the stocking using strong glue. Write the child’s name on the holly leaves. Hang out of reach where the light will display the colours. Fill with wrapped lollies when the child displays good behaviour or does exceptional work.
- These stockings are a good activity to commence the Christmas theme. They are a great incentive for the children to maintain their good manners and work habits for the remainder of the year.